

If you teach many students and groups using ESL Brains materials and need ways to organize the files on your computer, we have some good news: we have expanded the Saved Lessons functionality! Not only can you save your favourite ESL Brains lesson plans on the website, but you can also sort them into folders.
How do Saved Lessons work?
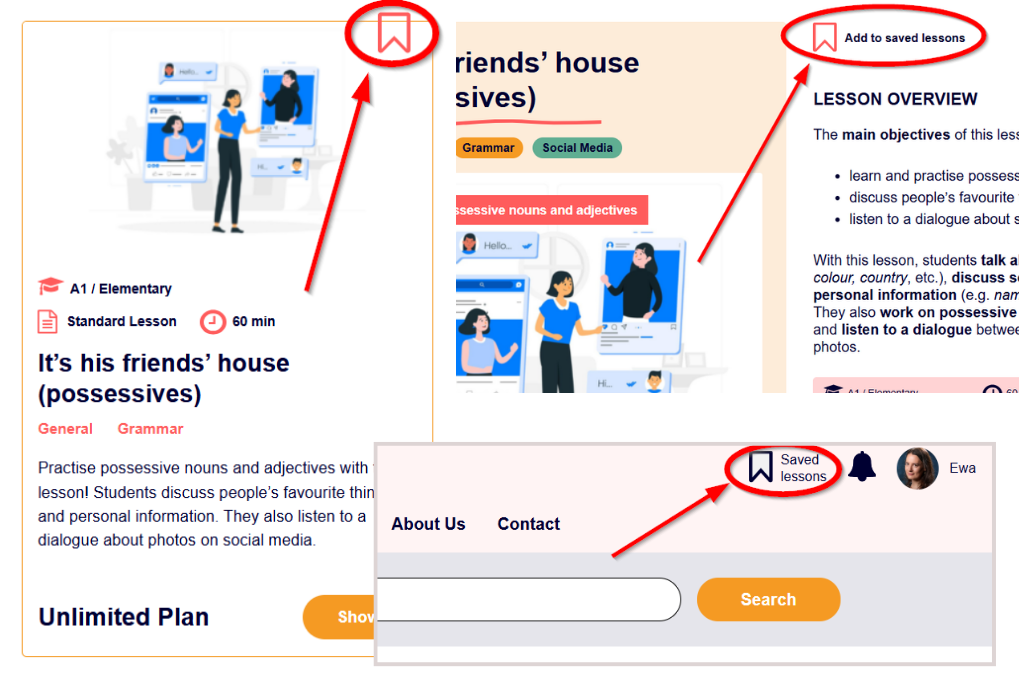
The process of saving starts just like it used to. You will still find the ‘Add to save lessons’ ribbon when browsing lessons and on the lesson page. And just like previously, you can access your saved lesson plans by clicking on the ‘Saved lessons’ ribbon in the top right corner of the page, right next to the notification bell.
What has changed?
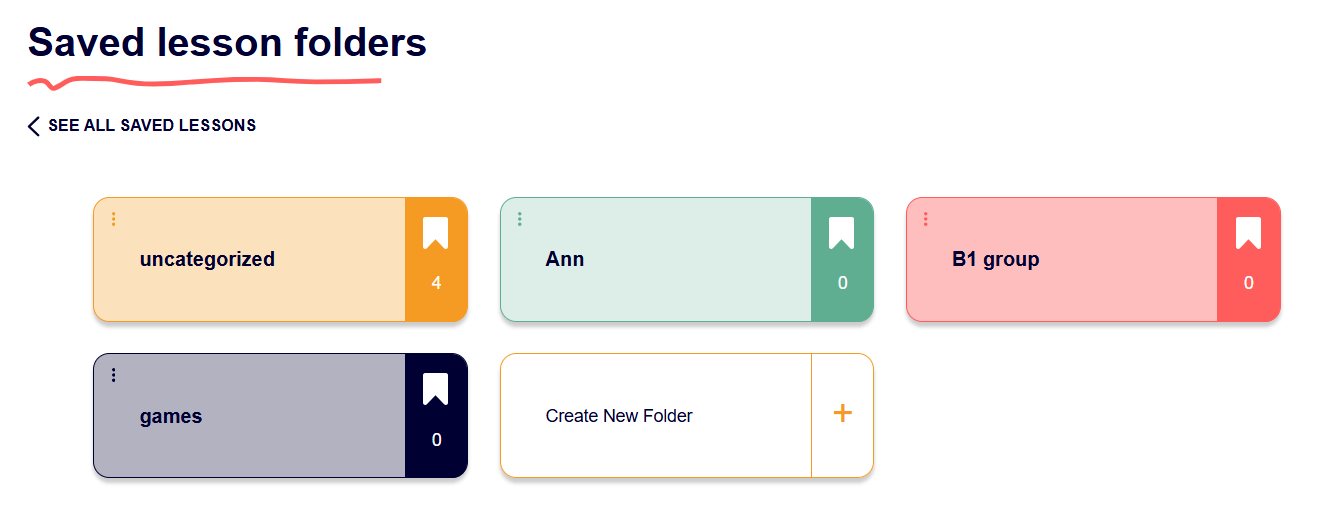
Every time you choose to save a lesson by clicking on the ‘Add to saved lessons’ ribbon, you will be asked which folder you want to add the lesson to. You can add the lesson to an existing folder or create a new one. The folders can also be renamed and deleted, and you can have up to six folders.
If you had some saved lessons before, you will now find them in the ‘uncategorized’ folder. Feel free to change the name of the folder if you want to!
We’re looking forward to your feedback!
We want to add more features to the Saved Lesson section. Let us know what would work best for you in the comments below.

It was about time! I like these new features!I find them useful. Definetely they come in handy.
Very handy, but not enough folders if you teach many students on a 121.
We’re just starting and will adjust the limits as time goes. What’s the number of folders you’d find enough for your purposes?
I work with students on Preply – it can vary from 1 month to another of how many students, but generally they are long term students; so it would be great to have as many individual folders as possible- currently I have 20 students each week – it could increase or decrease next month. Difficult to put an exact figure. Some students who have similar levels and targets can be placed together in a folder.
I am sooooo, happy. I was actually one (probably not the only one) that suggested that for you! Thank you!
That’s true! We developed this feature as a result of your feedback, and suggestions we received from many other teachers. Let us know what you think once you have a chance to use the folders for a while!